|
|||||||||
|
|
|||||||||
|
|||||||||
|
|
|||||||||
|
Text Walkthroughs --GUI(Graphical User Interface) Walkthrough --Icon Button images and title --Function / Tool Specific Walkthrough --General Walkthrough Walkthrough Video Walkthroughs ++ Tartarus Functions and Tools -- GUI(Graphical User Interface) Walkthrough ------------------------------------------------------------------------- The Gui: 3 Major Layouts for the main Tartarus V2- If you notice on the top of the main frame on the right. There are 5 buttons; from left to right-- [ -->> ] / [ <<-- ] (Open/Close) - Left panel for Icon Buttons / Text menu list  - Text Selection List - Automatically switches a text layout of all the functions and tools. - Text Selection List - Automatically switches a text layout of all the functions and tools.
 - This button switches to the Pulldown layout mode, - This button switches to the Pulldown layout mode,
[ Show Pulldown Menus ] / [ Hide Pulldown Menus ]- Open/Close the Pulldown menus in the Tartarus Window. Icon Button Layout - Some of us can remember shapes and colors better than others. For them there are Icon Buttons to each tool and function. The Text Buttons are simply the group launch of the proceeding few tools. Text Selection List Layout - For some reading is quick and having everything just layed out all the time is the quickest to get to every tool and function. Pulldown Layout - For some tools or functions are simple and don't require any user inputs, these functions have a option box. Click on the menu pulldown to run the command; click on the menu box on the right of the text to launch the window for that tool.  - Random Selection - Go to Text Walkthrough. - Random Selection - Go to Text Walkthrough.
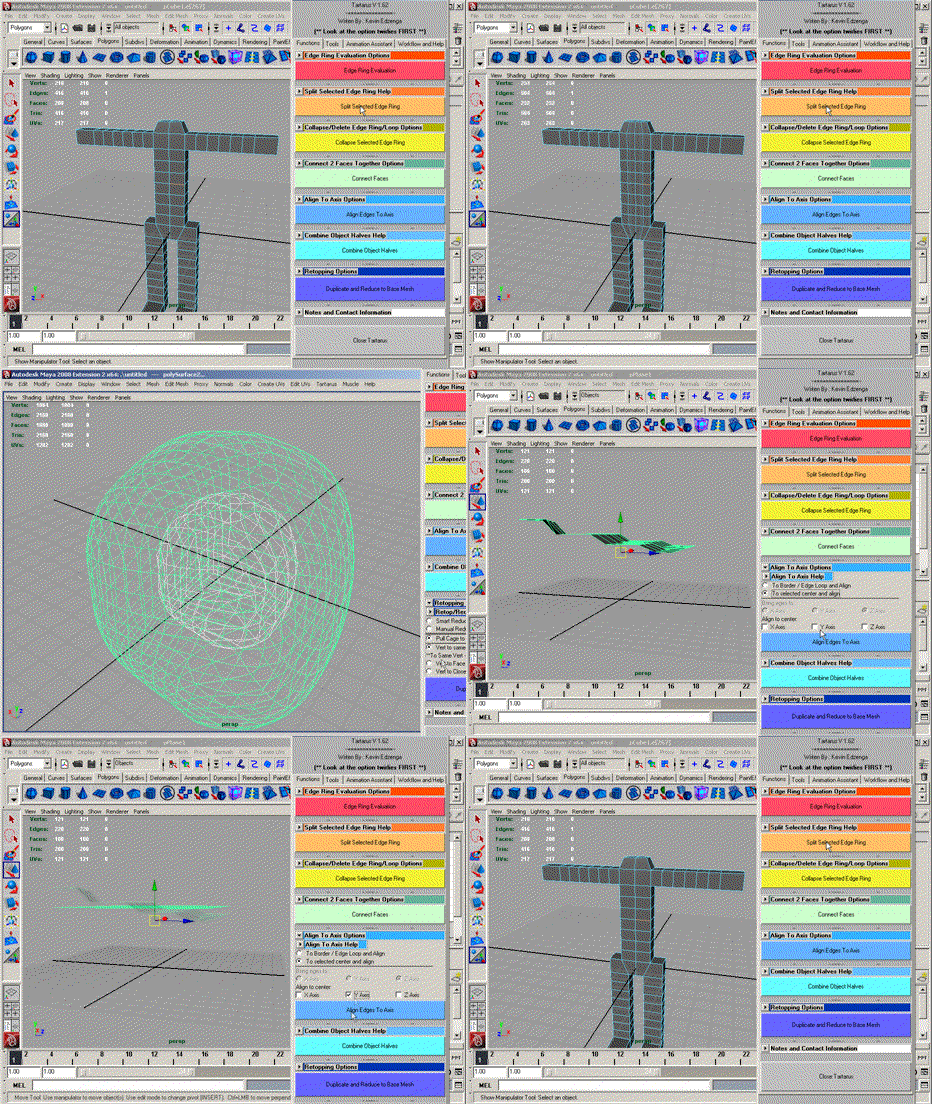
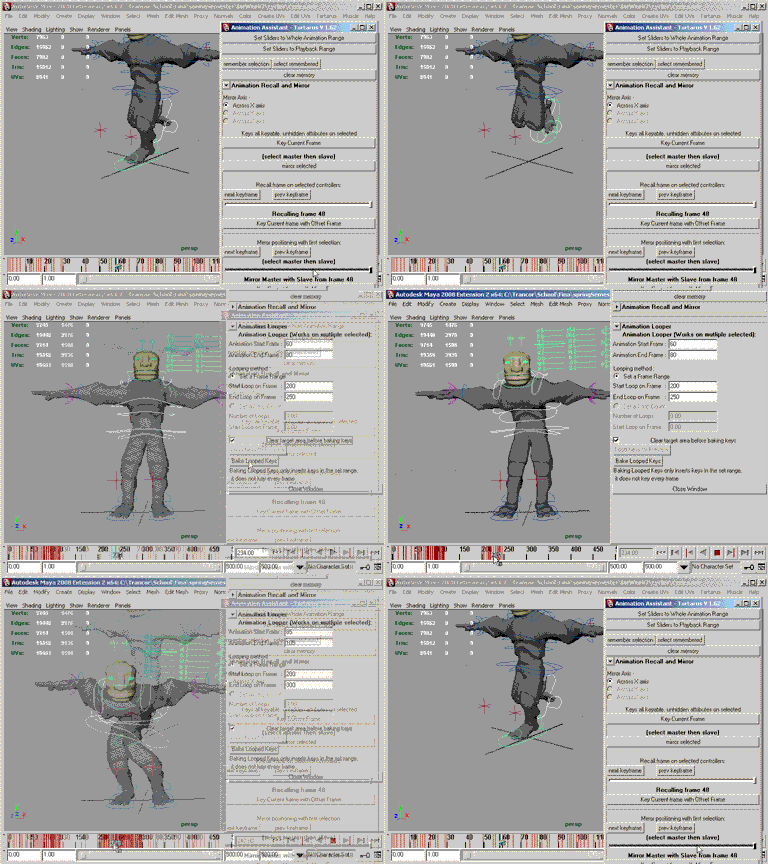
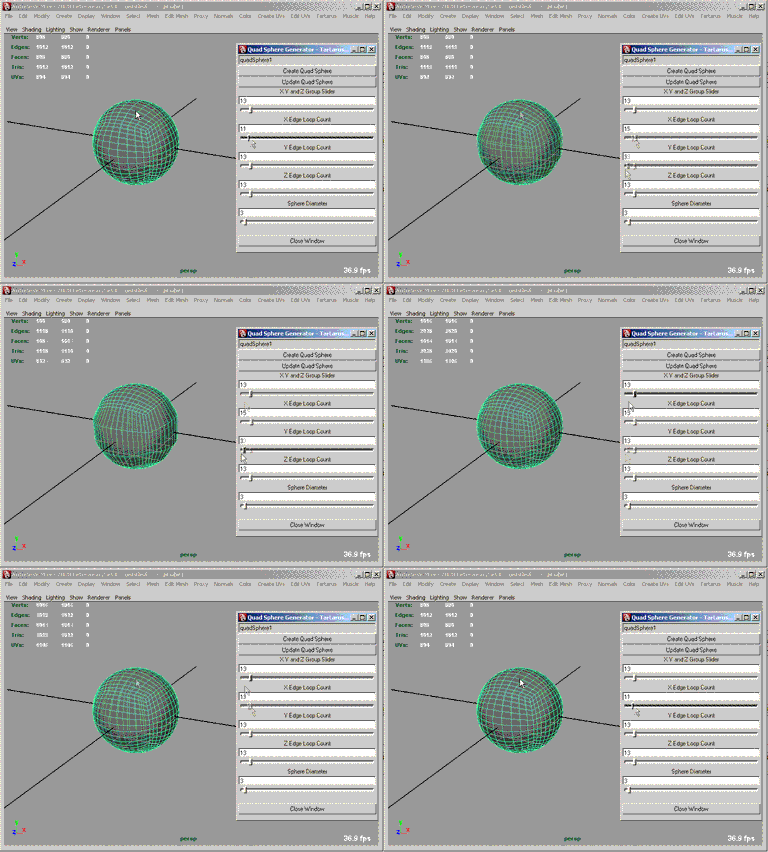
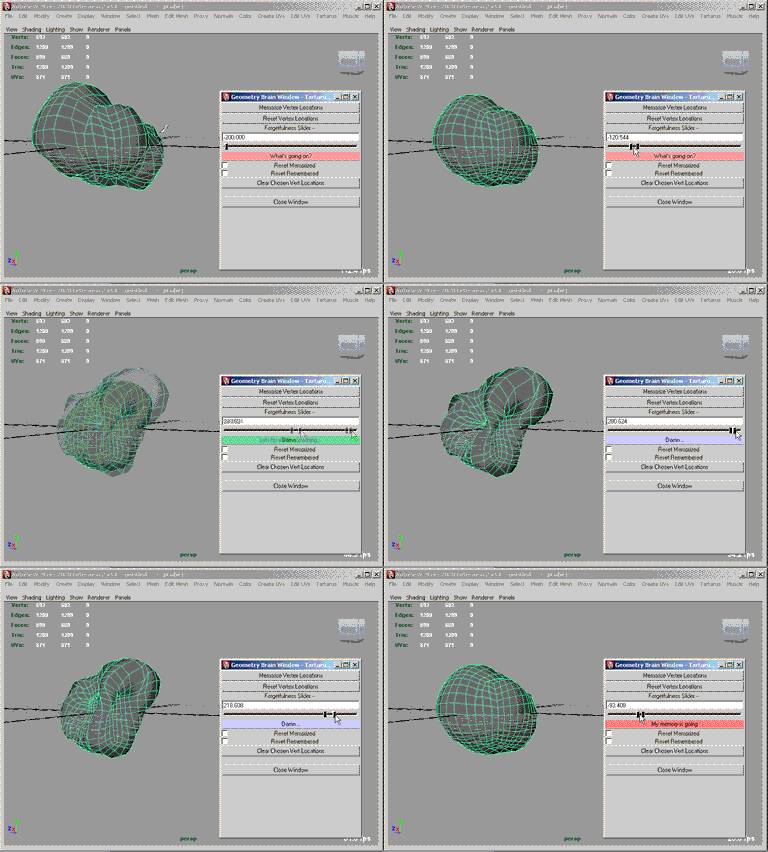
++ Tartarus Functions and Tools -- Function / Tool Specific Walkthrough ------------------------------------------------------------------------- { -- Functions } [- Edge Ring Evaluation -------------------------------------] Hotkey/Hotbox command -- edgeRingEvaluate; ----------------------- As part of how the edge ring evaluation works in Tartarus V 2.00, you can either put in a Min Edge Length or you can select a newly created piece of geometry and run an Evaluation. Remember to select only one object or one component of the object before running the script; only one. For a faster Edge Ring Evaluation, use "Fast Eval" for an evaluation with more than 5 or more major changes to a piece of geometry - OR - Turn off either of the "Smart Split" or "Smart Reduce" options. Smart Eval - Looks over every edge in a piece of geometry, and once a change is made will revaluate the newly created edges as well for further changes. This is a long proccess; and on big changes between evaluations, it will take much longer. Fast Eval - While still going over every edge of the object, changes made are not re-evaluated. This may cause un waned edge rings to clump together. It's suggested that you run an evaluation with the option "Smart Reduce Geometry" after to correct this problem, if results are unwanted. [- Split Selected Edge Ring -------------------------------------] Hotkey/Hotbox command -- splitEdge; ----------------------- Select an edge and hit the Split Selected Edge Ring button. This function will find the edge ring and split it for you. If you hit the button again and again, with every press, the last split will multiply by as many button presses as performed. [- Collapse Selected Edge Ring -------------------------------------] Hotkey/Hotbox command -- collapseEdge(0); ----------------------- Select as many edges you want to collapse the respective edge rings. Note: Do not select more than one edge on an edge ring or else you'll have an undesired result. [- Connect Face Function -------------------------------------] Hotkey/Hotbox command -- connectFace( *divNumber* , *spinVertNumber*, *linear/blend/curve*); ----------------------- Select 2 faces, either on the same object or on two different object, change the division slider for the ammount of divisions on the connection between the faces. After you Connect Faces, you can change the Slide Vert slider to offset which vert is connected to which vert. [- Align Edges To Axis -------------------------------------] Hotkey/Hotbox command -- edgesToOrig(**x,y, or z**); alignCenterTARTARUS(**X 1/0**, **Y 1/0**, **Z 1/0**); X,Y,&Z 1/0 - 1=on; 0=off ----------------------- To Border/Edge Loop and Align - Select an edge down the center of your object, or an edge on the mid border edge of a halved object. When the Align Edge to Axis button is pressed, the edge loop is found an centered on the chosen axis. Good for aligning the center edge loop for a perfect mirroring of the Obj. To Selected Center and Align - This finds the center of a selection and aligns all components selected with the center across the chosen ax(is/es). ----------------- Bring Edges to Radio Buttons - The X,Y, and Z axis buttons are the axis used in To Border/Edge Loop and Align. Align to Center Check Boxes - The X,Y, and Z axis check boxes are the ax(is/es) used in To Selected Center and Align. [- Delete Across Axis -------------------------------------] Hotkey/Hotbox command -- delNegPosAxis(**x, nx, y, ny, z, or nz**); n=negative axis ----------------------- X, -X, Y, -Y, Z, or -Z Axis Radio Buttons - This is the chosen direction you'd like to delete faces in. If you select -X, all faces less-than 0 on the X axis will be deleted when the Delete Across Axis button is pressed. [- Combine Object Halves -------------------------------------] Mirror Selected Geometry Check Box - With this on, the selected geometry will be mirrored across the chosen axis. X, Y, & Z Axis Radio Buttons - The axis that the Mirrored geometry is mirrored on and the Pivot point is moved to if either of these options are on. Move Pivot to Axis Check Box - When the pieces of geometry are combined or the mirrored piece of geometry's pivot point will move to what ever axis is chosen. For example, if a pivot point is at <<3, 4, 2>> and the piece of geometry is mirrored on its X axis, the pivot will move to <<0, 4, 2>>. Combine and Merge Obj Halves - This will combine and merge the mirrored piece of geometry with the original. The merge tolerance is .001; this is meant for the center vertices to merge, other unintentional merges may occur. [- Retopologizing -------------------------------------] Smart Reduce - Not working yet. Manual Reduce - Select any number of edges in a row or not. When Manual Reduce is used, every third edge ring is collapsed. ----------------------- Pull Cage To High Res Mesh - Select a cage geometry then the master geometry to pull to. Not only meant for cage to high res retops. Each option gives you the abilities for different outcomes. Vert to Same Number Vert - If you smooth an object in maya, pre and post smoothing, all vert numbers are left the same, except for the added vertices to the smoothed mesh. If you have an unsmoothed mesh and a smoothed mesh, if you select the low res mesh then the high res mesh, this Vert to Same Number option will pull out the low res mesh to the same numbers on the high res mesh. Vert to Face Normal Direction - Each vert of the cage (First selection) will be pulled to the surface of the Master (Second selection). Vert to Closest Vert - Finds all of the locations of each vert on both selected objects. The script will then run through each vertex on the Cage Obj (First selection) to find the closest vert on the Master Obj (Second selection). Each vertex on the cage will be moved to a vertex on the master. Use Previous Closest Verts Found Check Box - This option is for Vert to Closest Vert. When Vert to Closest Vert is ran, each vertex the cage moves to on the master is recorded. So, if this check box is checked on, those same numbers in the first run will be used for the next run. This Use Previous Closest Vert option doesn't need to be used with the same Master as when Vert to Closest Vert was originally ran. This is used for Obj imports of high res meshes so the low res mesh in maya can form to the high res's contours. { -- Tools } [- Generate Quad Sphere -------------------------------------] Hotkey/Hotbox command -- genQuadSphere(*x divisions*, *y divs*, *z divs*, *diameter*); ----------------------- Using the sliders, you can choose how many edge rings are on each axis of the quad sphere. The X,Y, and Z Edge Ring Group Slider will uniformly change all axis ring counts. The "max value" text field is the maximum value each slider and slide to. **WARNING** If you go over 35-40 rings for either/group axis sliders, the time to produce the sphere will be significantly higher. [- Geometry Brain -------------------------------------] Hotkey/Hotbox command -- Memorize Verts - vertFreezer; Reset Verts - vertWarmer; Forgetfulness Percent - brainRememberCondition(**-200 through 300**); Clear Locations - resetGeometryBrain(**Memorize 1/0**, **Reset 1/0**); 1/0 -- 1=On; 0=off; ----------------------- Memorize Vertex Locations - Select an object or Verts you would like to memorize the locations of. Reset Vertex Locations - Reset(move) that selected obj's verts or selected verts to the memorized locations. (Nothing needs to be selected to do this.) This function will also remember the locations of the verts as they were before moving to the memorized locations. This will be needed for the forgetfulness slider. The Forgetfulness Slider - If the slider is at : -200 - -10 - Inverted Memorized locations from Reset locations -10 - 10 - Reset Vertex Locations 10 - 90 - Blend between Memorized and Reset Locations 90 - 110 - Memorized Vertex Locations 110 - 300 - Inverted Reset locations from Memorized locations Clear Memorized/Reset Locations - Erase the vertex locations of either Memorized or Reset vertices. [- Selectables -------------------------------------] [-+- Select List -------------------------------------] Add Selected to "Select List" -- Adds the current selection to the "Select List" -Keep addition to list selected after adding - Additions to the select list will remain selected if this check box is checked on. Select - Selects the "Select List" Deselect - Deselects the "Select List" Toggle - Toggle the "Select List" items on/off ----------------- Remove Selected items from "Select List" - Removes the selected items from the "Select List" -Keep Non-List items selected - Leaves selected the items that were not on the "Select List" if this is checked on. ----------------- Toggle Selected from being on/off the "Select List" - Toggles the current selection from being in/out of the "Select List". Select previously removed item(s) - Items removed from the list through the above two buttons are remembered so you, the user, can reselect the items again. Select and Clear "Select List" - Select the "Select List" then clears the list Clear "Select List" - Remove all items from the "Select List" [-+- Select by Radius -------------------------------------] Query Vertex locations - You need to select your geometry first and hit the Query button to let the sliders run faster initially. The button doesn't need to be hit, the sliders will run the check for you if you select a different object. The button is merely for a quick first response from the sliders. Select Between radii - This button will select components on an object using the below sliders values in the selection. ----------------- Radius Range 1&2 of Selection Sliders are used to change the max and min radii of selection. The selection radius is found from the pivot point of an object. So, the selection will look like rings when you slide the sliders. |Range 2|<++++++>|R1| Pivot |R1|<++++++>|R2| Range 1&2 don't have to be in order. The max and min values are found between the two sliders. |Range 1|<++++++>|R2| Pivot |R2|<++++++>|R1| ----------------- Selection Returned - The component radio buttons will convert your selection upon change of the selected component. These are the options for which component to return in the selection. Invert Selection - This checked on will flip the direction of selection Min Radius / Max Radius - These sliders will determine the max and min range that the Radius Range of Selection sliders can move. [-+- Select Random -------------------------------------] Select Random on Object - This button will select components on an object using the below sliders values in the selection. Percentage to Select - By using the sliders below to determine what to select, this slider will select a % of the object. If the min and max sliders are changed, then the % selected will still be out of the total components, but only selected within the ranges of component numbers. Min/Max Random Range - These sliders determine the min and max number value range that the Percent to Select Slider selects between on the object itself. Random Seed - This number is the base behind the random values. This is what maintains the selection through changing the Percentage to Select Slider. Selection Returned - The component radio buttons will convert your selection upon change of the selected component. These are the options for which component to return in the selection. [-+- Select Closest Vert to Vert -------------------------------------] Select Within Tolerance - This button will select components on an object using the below sliders values in the selection. Select two objects before hitting this button. The first selected object is the object who's components will be selected by clicking on this button. The second Object selected is the master object, who's vert locations in space are used with the tolerance to select the chosen component type. ----------------- Select Verts Distance Tolerance of - is the distance from every vertex on the second selected object; if a component is within this distance it will be selected. Min / Max Closest Vert Tolerance Range Sliders - The min and max range Values for the Select Vert Slider. Selection Returned - The component radio buttons will convert your selection upon change of the selected component. These are the options for which component to return in the selection. [- Hair Tools -------------------------------------] Update Sliders - Do this before playing with the Parameter sliders. This will set the sliders to the U/V position that the follicle is at. If you do not update the sliders and select another hair follicle and slide the sliders, the hair will be moved to where the last hair selected to update the sliders was. Parameter U/V - These sliders will move the selected follicle up/down or across the object. [- Animation Assistant -------------------------------------] [-+- Animation Recall and Mirror -------------------------------------] Mirror Axis - The axis inwhich two selected controllers are reflecting. Key Current Frame - Finds keyable, unhidden attributes and keys them Mirror Selected - Select master then slave. Translation and Rotation attributes are mirrored across the chosen axis. ----------------- The sliders are the frame that the recall/mirroring is occurring from ----------------- Next/Previous Keyframe Buttons - Find the next/previous key on a selected object. Key Current Frame with Offset Frame - With one object selected; this will key the selected object from the selected frame on the slider. ----------------- Next/Previous Keyframe Buttons - Find the next/previous key on the first selection which is mirrored and applied to the second selection. Key Current Frame with Mirror Frame - With two objects selected; this will key the second selected object with mirrored attributes from the selected frame on the slider. ----------------- Next/Previous Keyframe Buttons - Find the next/previous key on a selected object and mirrors it with itself. Key Current Frame with Self Mirror Frame - With one object selected; this will key the selected object mirrored from the selected frame on the slider. [-+- Animation Looper -------------------------------------] Animation Start/End Frame - The animation range that you wish to loop. Looping Method: Set a Frame Range - Will loop and loop the selection animation range as many times until it reaches the end frame. Start/End Loop on Frame - The start and end frames for the Frame Range loop method. Clear target area before baking keys check box - With this checked on,it will clear the loop area of keyframes; thus copying the animation exactly as it is. With the checkbox off, any keyframes within the looping area will remain. causing very strange animation. ++ Tartarus Functions and Tools -- General Walkthrough --------------------------------------------------- The functions were designed to be used one after another in the modeling process. To build out a most basic of bodies in a few extrudes from a cube. Run the Edge Ring Evaluate to split in new rings for the arms and legs and torso. Then use the Split Selected Ring to add rings where the Edge Ring Evaluate didn't get. Start extruding out the fingers and build out the body through sculpt geometry tool and what not. Then while putting in detailing or changing geometry flow, using collapse ring and delete loop to get rid of edges and verts that are un-needed quickly. If your working on half of a model to start, you'll end up having problems with the center of the body moving off of the axis. This makes a mirror and merge not work as well; because some of the verts will be off, there will be holes in the mesh. You can grab a border edge on your center axis of your half model, align to axis- To Border / Edge Loop and Align. This will center that edge for you on the chosen axis. With that half of an object, you can go to Mirror/Combine Object Halves. Here you can chose to Mirror the geometry over an axis; move the pivot point from where it is to the axis you are mirroring over; and combine and merge Object Halves. The combine and merge option works with two selections, so if you have pieces of geometry lined up and you just want to combined them and merge real fast, you can do that too. Some tools have been designed for a purpose in mind, but then later turn into a tool I will use for a wide variety of uses. The geometry brain was designed with the intention that it can be used like a remember for a head you are making blend shapes for. Just sculpt the head how you want for the pose; duplicate the mesh. The hit reset and the original mesh is back to the original pose you modeled it in. Other tools were created just because I thought it would be fun to do. This is like the Selectables- Select List. Most of the toggle selected from list and selecting the previously removed. But these can be used for modeling quicks for focusing what part of a mesh you are sculpting or isolating out. Videos Here is a link to a Video Walkthrough explaining the 4 different layouts for Tartarus. Pick what layout is right for you --
Here is a link to a Video Walkthrough showing whats new to Tartarus V2.00 --
(Below Videos are from Tartarus V 1.63) |
|||||||||
|
|
|||||||||
|
|
|||||||||
|
|


